
How to Clean a Toaster

When was the last time you gave your toaster a good clean? If you can't remember, it's probably been too long.
Thankfully, cleaning a toaster is a straightforward process that requires just a few basic supplies and a bit of elbow grease. In this article, we’ll cover why it’s important, and the best tips for keeping your toaster clean.
Why should you clean your toaster?
Regular cleaning is recommended for keeping your toaster performing at its best, boosting its lifespan, and making sure your toast tastes great every time. Plus, a clean toaster is safer to use. Let’s dive into the major reasons for keeping your toaster spick and span:
Preventing fire hazards
Crumbs and debris can accumulate inside your toaster, creating a potential fire hazard. Regular cleaning removes these particles and reduces the risk of a fire starting. Nobody wants their morning toast to come with a side of kitchen flames!
Extending lifespan
Over time, crumbs, and residue can build up on the heating elements, leading to uneven heating and potentially damaging the toaster. By keeping your toaster clean, you can prevent these issues and extend its life. Think of it as giving your trusty toaster a bit of TLC. It'll thank you by working perfectly for years to come.
Improving taste
No one likes the taste of burnt crumbs on their toast. Residue from previous toasting sessions can affect the flavour of your toast, making it taste burnt or stale. Cleaning your toaster makes sure your toast always tastes fresh. Whether you’re a fan of jam, marmalade, or good old butter, a clean toaster will make sure your toast is always top-notch.
Keeping your kitchen clean
Toasters often sit on the kitchen counter, making them a visible part of your kitchen decor. Keeping your toaster clean and presentable stops it from becoming an eye-sore. A sparkling toaster can add a touch of shine to your kitchen, making it look tidy and well-kept.
Eliminating odours
No one loves the smell of burnt toast, so why let it linger in your kitchen for longer than necessary? Burnt crumbs can cause your toaster to emit unpleasant smells. Regular cleaning keeps your toaster smelling fresh and clean. Plus, a fresh-smelling toaster makes your kitchen a more pleasant place to be.
How to clean your toaster
There’s not a lot you’ll need to gather before starting the cleaning process. These are the main things you’ll need:
-
Warm water and washing up liquid.
-
Sponge or soft cloth.
-
Small, soft brush or old toothbrush.
-
A clean towel.
How to clean the inside of your toaster
With these tools and materials at the ready, you’re all set to give your toaster a thorough clean. Ready to roll up your sleeves and get started? Let’s go:
1. Prepare your toaster
First and foremost, unplug your toaster and allow it to cool completely before you start cleaning. This step is crucial for safety and prevents any risk of electrical accidents.
Once the toaster is unplugged and cool, place it on a clean, flat surface near your sink or a bin. A stable and easy-to-clean area is ideal for this task.
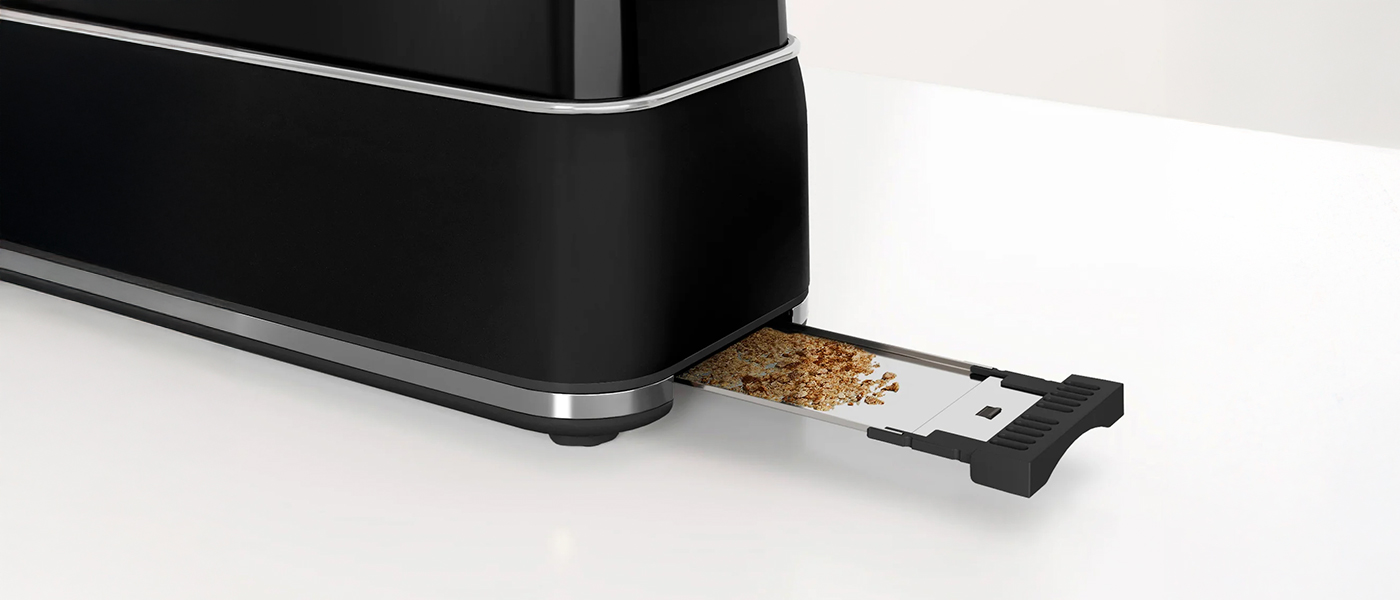
2. Remove the crumb tray and racks
Now, let’s get into the real details. Locate the crumb tray, which is usually found at the bottom of the toaster. Gently slide it out and be cautious, as it may still be hot if the toaster was recently used.
Some toasters have multiple crumb trays, so be sure to check for any additional ones. If your toaster has removable racks or grates, take them out as well. These parts often collect crumbs and need a good clean too.
3. How to clean the inside of your toaster
Hold the toaster upside down over a sink or bin and give it a gentle shake to dislodge any loose crumbs. For those pesky, stubborn crumbs that won’t come out, you can use a compressed air duster to blow them out.
With most of the loose crumbs removed, use a small brush to clean the inside of the toaster. Brush in all directions, reaching into all the nooks and crannies without causing any harm to the heating elements.
How to clean the exterior of your toaster
You’ve got the interior of your toaster looking brand new, now let’s move onto the exterior:
1. Gentle cleaning
Wipe down the outer surfaces of your toaster with a damp cloth or non-abrasive sponge. This removes surface dust, grease, or fingerprints. For stainless steel toasters, you can add a bit of white vinegar to the cloth for extra shine.
2. Dealing with stubborn stains
Stains staying put? It’s time to go nuclear on them. There are two great ways to deal with these difficult stains:
-
Baking powder - mix baking powder with water to create a thick paste. Apply the paste to affected areas and let it sit for about 15 minutes. This helps break down tough stains. Then, gently scrub the residue away with a damp cloth, and wipe off any leftover paste.
-
White vinegar - mix white vinegar and water in a spray bottle. Spray the solution onto a cloth or sponge and gently scrub the exterior of the toaster. This method is effective for removing grease and grime.
3. Avoiding damage
Avoid using abrasive tools or harsh chemicals that could scratch or damage the toaster's surface. Stick to microfibre cloths or non-scratch pads for a gentle yet effective clean. Treat your toaster with care, and it will look brand new for longer.
4. Extra care for stainless steel toasters
Stainless steel toasters require a bit more attention to maintain their pristine appearance. Wipe in the direction of the grain to avoid streaks. Avoid using acidic or citrus-based cleaners as they can damage the finish. Instead, use a soft, non-abrasive cloth with dish soap and warm water.
5. Cleaning the crumb tray
Hand wash the crumb tray with dish soap and warm water. Scrub it gently to remove any stuck-on crumbs or residue. Rinse it thoroughly and dry it completely before placing it back in the toaster.
6. Reassemble the toaster
Once all the parts are clean and dry, reassemble your toaster. Return the crumb tray to its position, checking it clicks into place. Replace any removable racks or grates.
And just like that, your toaster is now clean, safe, and looking splendid.
How to remove melted plastic from a toaster
Accidents happen, and sometimes plastic can melt onto your toaster. It might seem like a disaster, but don't worry, here’s how to safely remove it:
First things first, you’ll want to remove as much of the melted plastic as possible using a wooden or plastic scraper. Be gentle to avoid scratching the surface of your toaster.
Then, sprinkle some baking powder on a damp sponge and give the area a good scrub. Baking powder is a natural abrasive that helps to lift away the melted plastic without causing damage.
Wipe away the residue with a clean, damp sponge and repeat the process as necessary. For any stubborn residue that’s proving difficult to shift, dab a bit of acetone-based nail polish remover onto a cotton ball and gently rub the area. This should help to remove any discolouration caused by the plastic.
Finally, wipe down the area with a water-dampened soft cloth to finish. Your toaster should be looking as good as new, and you’re ready to get back to toasting.
How to maintain a clean toaster
That’s the cleaning out of the way, but if you incorporate some small maintenance tasks into your weekly routine, you can help to keep your toaster working well. Here are our top maintenance tips:
Keep on top of those crumbs
Make it a habit to regularly empty the crumb tray to improve airflow and prevent odours. A simple check and empty after each use can make a big difference, as a crumb buildup is a fire risk.
Establish a weekly cleaning routine
Incorporate cleaning your toaster into your weekly kitchen cleaning routine. This prevents grime build-up and keeps your toaster in top condition, making sure it works efficiently. A quick weekly clean will keep you informed on any changes to the toaster, so if you spot any damage, you can replace your toaster before it becomes a problem. Speaking of getting a new toaster, you can read our ultimate guide to buying a new toaster right here.
Always follow your nose
If you notice a burning smell and there are no food particles inside, it might be coming from a broken electrical component in the toaster. In such cases, it's best to consult a professional or consider replacing the toaster to ensure safety.
Find the perfect toaster at Morphy Richards
Regular cleaning is essential for a safe and well-functioning toaster. By following these steps, you can keep your toaster in top condition, ensuring it performs efficiently and safely.
But eventually every toaster will toast its last slice, and when that time comes, you can find a great replacement at Morphy Richards.
When you buy direct from Morphy Richards, you’ll benefit from a two-year warranty (with an extra year of warranty for free when you register your toaster with us).
We also offer free shipping on qualifying orders, and flexible payment options that let you spread the cost of your new toaster.
Shop Morphy Richards toasters now
For more home appliance buying guides, inspiration and recipes, explore the Morphy Richards blog…
How To Use A Toaster | How To Upgrade Your Kitchen | Buying a Toaster: Your Complete Guide
Best regards.
Accept my unexpected message in good faith. You can only achieve financial freedom by creating multiple income streams. I represent investors in the Gulf region who are currently expanding their financing portfolio with loans outside the Gulf region at an annual rate of 1.5% for a period of 25 years and above {Pure Loan/Finance} in the following sectors, oil/gas, construction, real estate, stock speculation and mining, transportation, healthcare and tobacco, communication services, agriculture, forestry and fisheries, i.e. any sector, mainly interested in debt financing.
Sincerely.
Mr. Davidson Albert.
Investment Accredited Broker.
CONTACT EMAIL: smartloanfunds@gmail.com
WHATSAPP: +385915608706
Leave a comment